

Transcript to Optimised LinkedIn Post
A free Claude skill that does it in two minutes for you

You are sitting on content you have already made.
You gave a talk. You sat on a panel. You recorded a podcast, or a client webinar, or a long sales call. The ideas were good enough to say out loud to a room. Then the recording goes into a folder and nothing happens to it.
I kept doing this. A 40-minute talk holds four or five points worth posting, and I would post none of them. Turning a rambling transcript into something publishable felt like a job I never had time for.
So I built a tool that does it.
It is a Claude skill. You upload a transcript, it asks you a couple of questions, and it gives you back one LinkedIn post, written to perform under the current algorithm and to read like a person wrote it.
It is free. The skill, and the full set-up below, are yours.
Two things before we start. Save this issue, because you will want the steps in front of you when you set it up and if you know someone who speaks for a living and posts none of it, send it to them. That is who this helps most.
What a skill is.
A skill is a set of instructions you load into Claude once. After that, Claude follows them automatically whenever the task comes up.
You do not paste a long prompt every time. You do not need to remember anything. You upload your transcript, ask for a post, and the skill does the rest.
It does one job: transcript in, one strong LinkedIn post out.
Why it does not sound like AI.
This was the part I cared about most.
Most AI-written posts are easy to spot and LinkedIn now reduces the reach of content that reads as fully machine-made. That synthetic smoothness costs you views.
So the skill is built to avoid the tells. No em dashes. No “in today’s fast-paced landscape”. No padding things into groups of three. No reframing tricks like “it’s not X, it’s Y”.
It is told, in writing, to keep at least one concrete detail from your actual transcript in every post. A real number, a real example, a real moment. That is what separates a human post from filler, and it is what survives into the draft.
It will not invent quotes or statistics. If a stronger post needs a figure that is not in your transcript, it asks you for it.
Get the skill first.
Before the set-up, download the skill. Everything is in one Google Drive folder, free to access here:
Inside are two files.
The skill itself, named transcript-to-linkedin.zip, which is the file you upload into Claude.
A more detailed copy of this guide, so you have the steps offline too that you can print off and follow.
Download the zip and save it somewhere you can find it, like your Downloads folder. Then follow the steps below.
One thing to know up front: you need a paid Claude plan. Custom skills are not on the free tier.
Here is the step-by-step guide.
It looks long because I have written down every click. It takes about five minutes, and you only do it once.
There are three parts.
Part 1 switches on the setting that lets skills run.
Part 2 installs the skill.
Part 3 is how you use it, every time, in three steps.
Part 1: Switch on the setting.
Skills only work if one setting is turned on first. You do this once.
1. Open Claude and sign in.
Go to claude.ai in your browser and sign in.
2. Open your Settings.
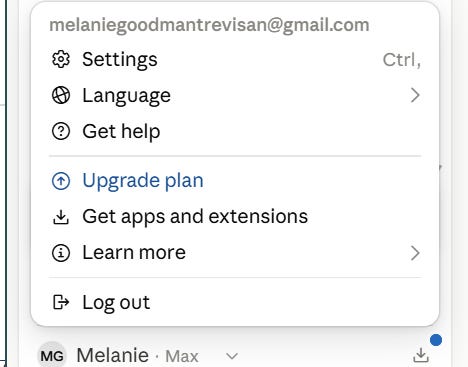
Click your name or initials in the bottom-left corner of the screen, then click Settings.
3. Turn on Code Execution and File Creation.
In Settings, find the section called Capabilities. On some versions it is called Features. Find the option named Code Execution and File Creation and switch it on.
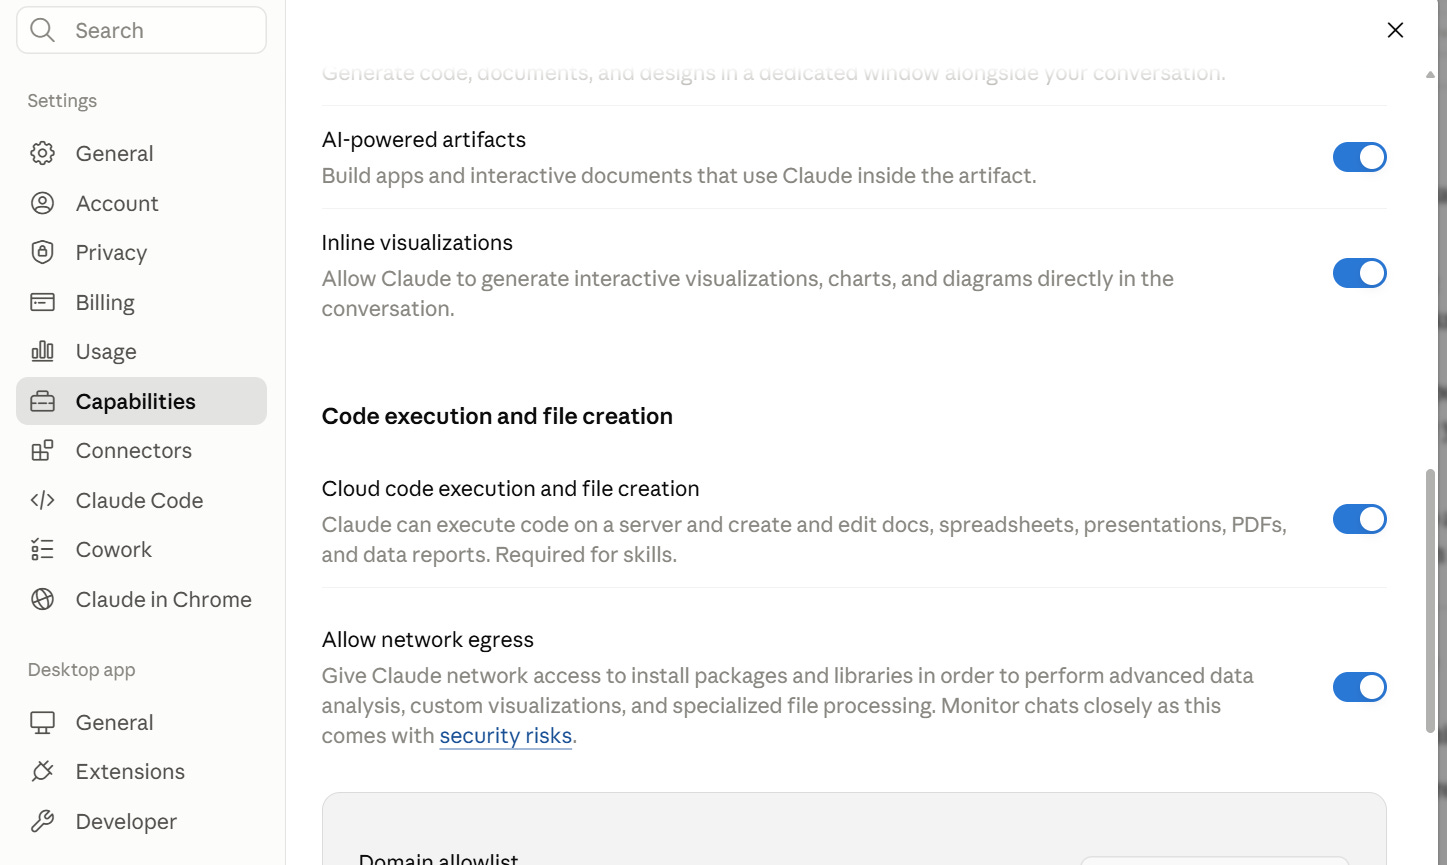
This is what lets the skill read your transcript and work with it. If it is off, the skill cannot run.
Part 2: Install the skill.
Now you load the zip file into your account. Also a one-off.
4. Find the Skills area.
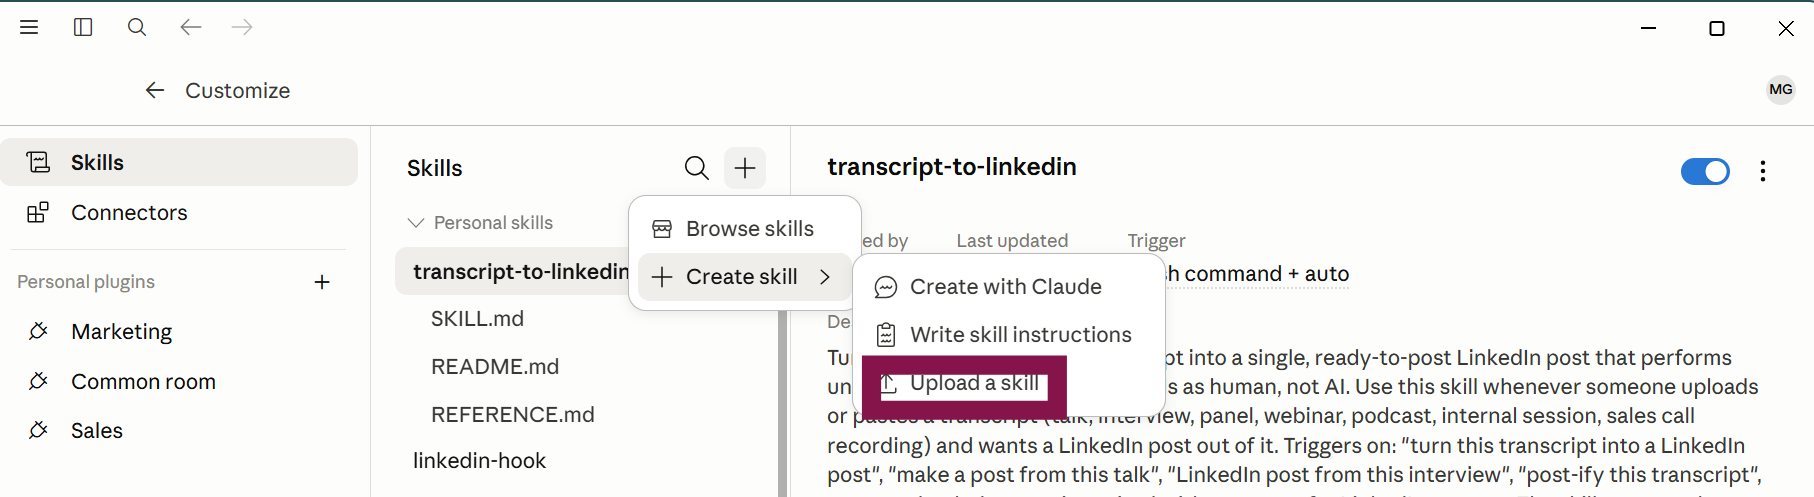
Still in Settings, look for Customise, then Skills. On some versions you reach Skills through the Capabilities section instead. If you do not see it in the first place you look, check the other menu. It is in one of the two.
5. Start adding a skill.
Click the plus button, then choose Create skill. Some versions say Upload skill.
6. Upload the zip file.
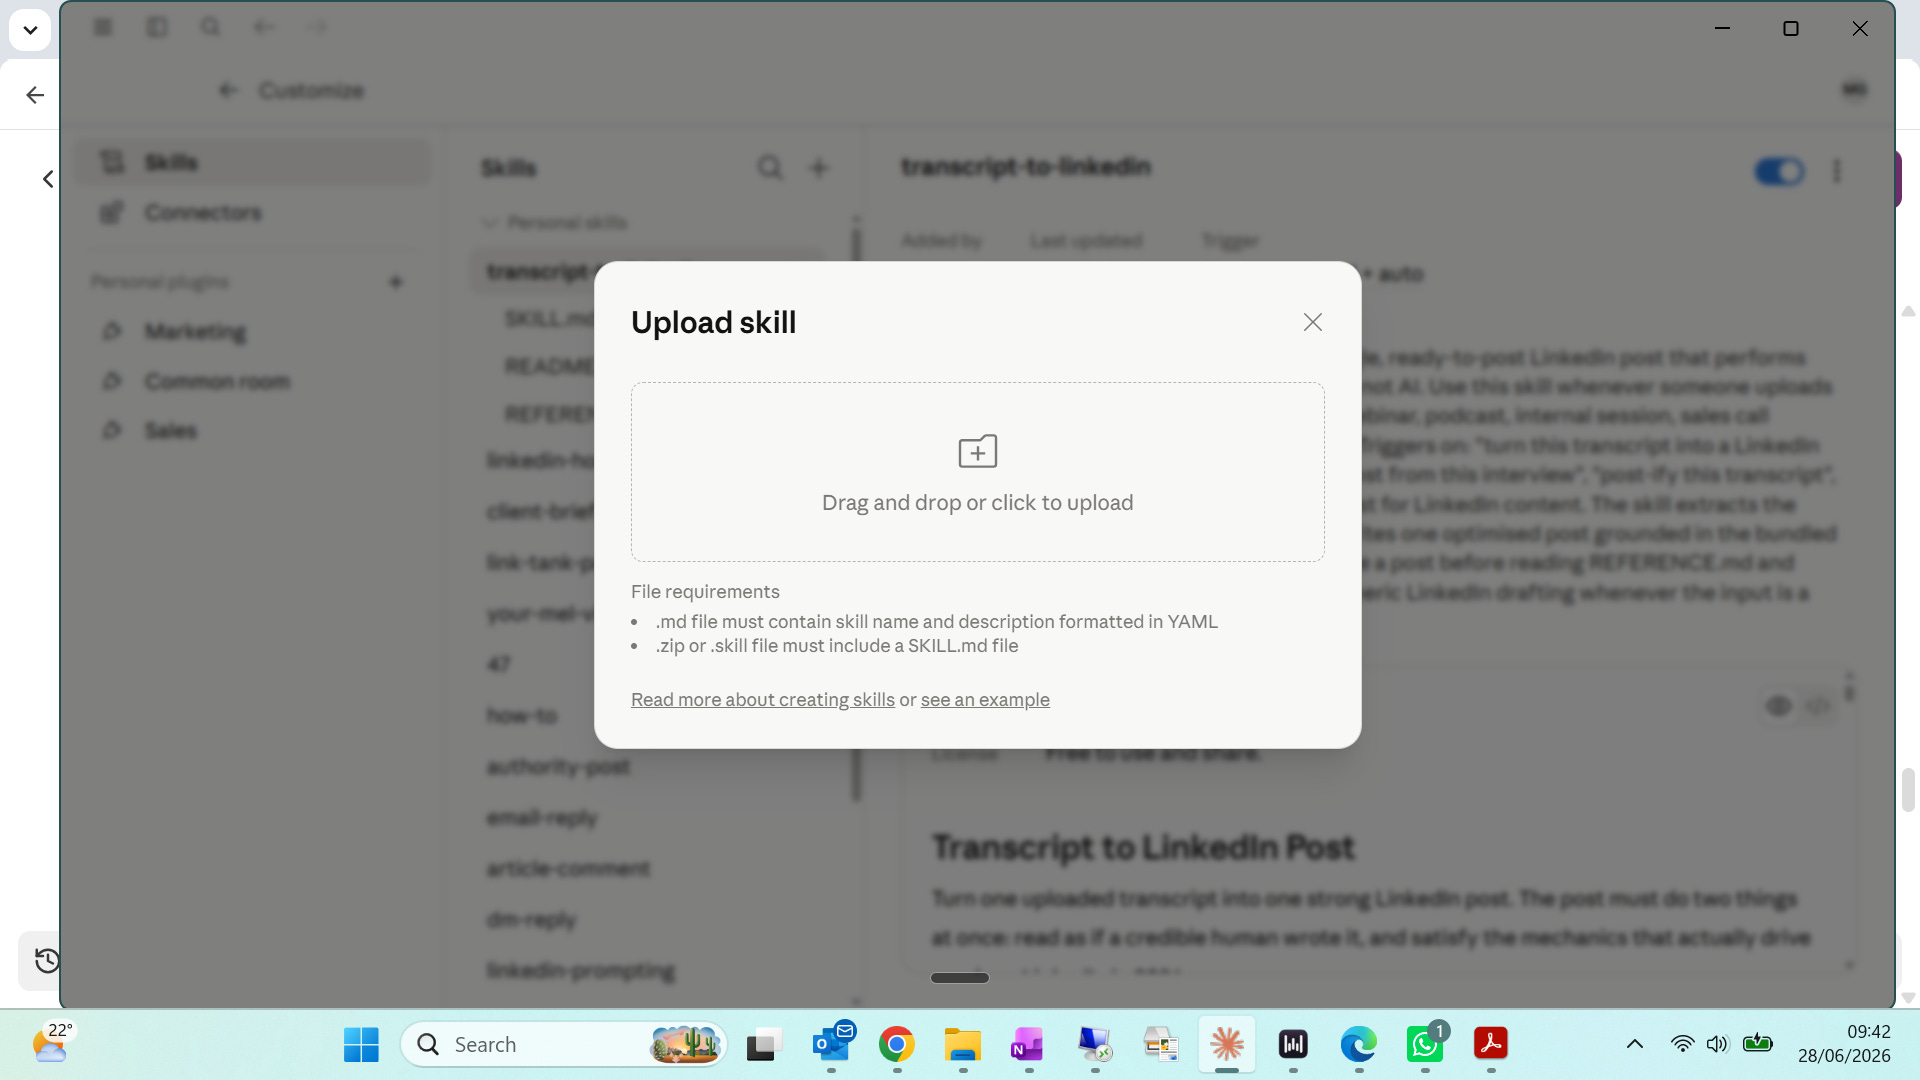
When it asks you to choose a file, select the transcript-to-linkedin.zip you downloaded earlier. Upload the zip exactly as it is. Do not unzip it first, and do not open it and upload the files inside one by one.
(If you see an error about a nested zip file, it means your computer wrapped the file in an extra layer when it downloaded. To fix it: unzip the file once by double-clicking it, which gives you a folder called transcript-to-linkedin. Then re-zip that folder yourself. On a Mac, right-click the folder and choose Compress. On Windows, right-click and choose Send to, then Compressed (zipped) folder. Upload the new zip.)
Copy & Paste Skill
This is the full skill if you want to Copy & Paste
---
name: transcript-to-linkedin
description: >
  Turn an uploaded speaker transcript into a single, ready-to-post LinkedIn post that performs under
  the 2026 algorithm and reads as human, not AI. Use this skill whenever someone uploads or pastes a
  transcript (talk, interview, panel, webinar, podcast, internal session, sales call recording) and
  wants a LinkedIn post out of it. Triggers on: "turn this transcript into a LinkedIn post", "make a
  post from this talk", "LinkedIn post from this interview", "post-ify this transcript", or any
  uploaded transcript paired with a request for LinkedIn content. The skill extracts the strongest
  idea, runs a short elicitation, then writes one optimised post grounded in the bundled 2026
  algorithm reference. It does not free-write a post before reading REFERENCE.md and running the
  elicitation. Prefer this skill over generic LinkedIn drafting whenever the input is a transcript.
license: Free to use and share.
---

# Transcript to LinkedIn Post

Turn one uploaded transcript into one strong LinkedIn post. The post must do two things at once:
read as if a credible human wrote it, and satisfy the mechanics that actually drive reach on
LinkedIn in 2026.

This skill is built for anyone to use. It assumes no house style and no personal brand. It produces
a neutral, authoritative "industry thinker" voice that the user can lightly adjust to sound like
themselves.

## Before writing anything

Do these three things first, in order. Do not skip to drafting.

1. **Read `REFERENCE.md`** in this skill folder. It holds the 2026 algorithm findings the post is
   built on (post structure, winning frameworks, length, hooks, hashtags, the call-to-engage). The
   numbers there come from a real published study; treat them as the spec.
2. **Read the transcript.** If it is uploaded rather than pasted, read it from disk. Identify the
   speaker(s) by name where the transcript makes them clear, and note who said what. You will
   attribute specific claims to the person who made them.
3. **Run the elicitation** below using the question tool. One transcript can yield several posts;
   the elicitation decides which one to build now.

## Step 1 — Mine the transcript

Read the whole thing and pull out, for your own working notes (not shown to the user yet):

- The two or three most surprising, counterintuitive, or specific things said. Specificity means a
  real number, a named decision, a concrete example, a turning point. Vague inspiration is not a
  candidate.
- Any first-hand experience or lived detail. This is what makes a post impossible to fake, and
  fakeable posts are penalised (see REFERENCE.md on AI detection).
- The single clearest through-line. Most transcripts contain one idea worth a post and a lot of
  filler. Find the one.

If the transcript genuinely has no concrete, specific, or surprising material, say so plainly and
ask the user what they want to emphasise rather than inventing detail.

## Step 2 — Elicit direction (use the question tool)

Ask these as tappable options. Keep it to these three questions.

1. **Which angle?**
   - A leadership or business lesson (something that changed how the speaker operates)
   - An emerging theme, pattern, or trend the speaker named
   - A contrarian take the speaker holds
   - Let the skill pick the strongest one

2. **Which structure?** (these are the four that outperform in 2026 — see REFERENCE.md)
   - Case Story (challenge → decision → outcome → lesson)
   - Mistakes List (specific mistakes, each one a line)
   - Before / After Contrast (old way vs new way)
   - Playbook (3–5 concrete steps)

3. **How much polish vs. rawness?**
   - Keep my voice raw and specific (recommended)
   - Smooth and corporate
   - Somewhere in between

If the user has already stated an angle or structure in their message, skip that question and use
what they gave you. State the assumption in one line rather than asking again.

After the user answers, also confirm one thing in plain text if it is not already clear: **British
or American English?** Default to British if the transcript or user signals it; otherwise ask. Do
not guess silently.

## Step 3 — Assemble the post

Build the post on the six-part spine from REFERENCE.md, in this order. Do not label the parts in the
output. They are scaffolding, not headings.

1. **Hook** — one or two lines. This is the only thing scored before the click and the only thing
   visible before "see more". Make it negative, counterintuitive, personal, or numeric. One hook,
   not three.
2. **Promise** — within the first few lines, make clear what the reader gets for staying.
3. **Positioning** — one line that grounds the authority in the speaker's actual experience, written
   fresh, never as a templated credentials block.
4. **Core message** — the substance, arranged in the chosen structure. Short paragraphs. Line breaks
   for rhythm. Scannable on a phone.
5. **Conclusion** — one deliberate line that crystallises the takeaway.
6. **Call to engage** — invite a reply or leave a thought that cannot be resolved instantly. Not a
   sales CTA. A closed question drives comment volume; an open question drives longer-term reach; a
   bold closing statement suits a confident take. Pick one that fits the post.

Then add **0–3 hashtags** (none is fine, and often better). Reserve 4–5 only for genuinely
topic-heavy content. Never more than that.

## Step 4 — Run the quality check before showing the user

Silently check the draft against this list. Fix anything that fails before presenting.

**Performance checks (from REFERENCE.md):**
- Hook works without the rest of the post and earns the click.
- There is a clear promise within the first three lines.
- The post is scannable: short paragraphs, white space, no wall of text.
- Length fits the intent: under ~600 characters for a sharp single-idea post, or ~1,400–1,800
  characters for a fuller piece. Avoid the dead middle that does neither well.
- It ends with a real invitation to engage, not a pitch.
- 0–3 hashtags, 5 maximum.
- Specific claims are attributed to the named speaker where the transcript supports it.

**Anti-AI checks (this is what stops the post being penalised and what makes it read as human):**
- No em dashes anywhere. Use full stops, commas, or brackets.
- No "ALL CAPS section labels" structure and no mechanical three-part / rule-of-three scaffolding
  showing through.
- No negative parallelism ("not X, but Y" / "it's not about X, it's about Y").
- No copula avoidance ("serves as", "stands as", "boasts", "features" where "is" or "has" is
  meant).
- No significance puffery ("underscores", "highlights the importance of", "marks a pivotal shift",
  "reflects a broader", "testament to").
- None of the AI-vocabulary tells: crucial, pivotal, landscape, tapestry, delve, foster, garner,
  enhance, leverage, robust, navigate (figurative), realm, vibrant, seamless, intricate, profound,
  resonate, in today's fast-paced world, ever-evolving.
- At least one specific, concrete detail that could only have come from this transcript. If you
  cannot find one, the post is too generic. Go back to the transcript.
- The opening is not a weak generic greeting.

## Step 5 — Present

Give the user:

- The finished post in a copy-ready block.
- Two or three alternative hook lines they can swap in, since the hook carries the most weight.
- One line on which call-to-engage you used and why.

Keep commentary short. The post is the deliverable.

## What this skill will not do

- It will not invent quotes, numbers, statistics, clients, or outcomes that are not in the
  transcript. If a stronger post would need a figure the transcript does not contain, say so and ask
  the user to supply it rather than fabricating it.
- It will not attribute a view to a named speaker unless the transcript supports it.
- It will not produce more than one post per run unless asked. One transcript, one post.
7. Check it appeared and is switched on.
Claude reads the file and shows the skill in your list, named transcript-to-linkedin, with a short description. Make sure its toggle is on. That is the install finished!
Part 3: How to use it.
This is the bit you do every time you want a post. You do not need to remember the skill’s name or type any special commands.
8. Start a new chat and upload your transcript.
Click New chat. Then click the paperclip or plus icon in the message box and attach your transcript. A text file, a Word document, or a PDF all work.
9. Ask for a post.
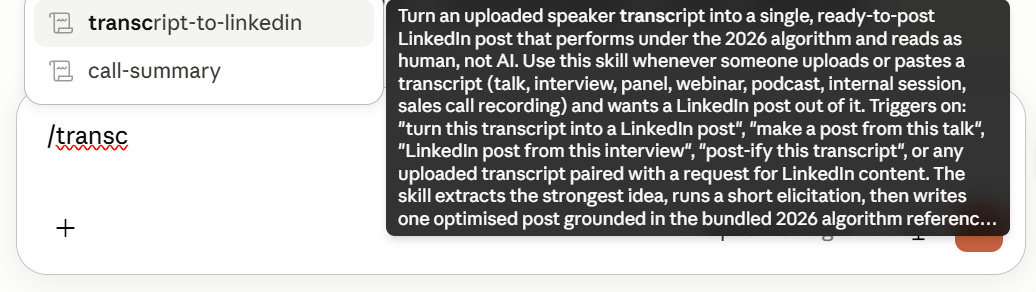
Type something simple, such as: turn this transcript into a LinkedIn post. Send it. The skill recognises what you want and switches itself on.
Just start typing /transcript…
10. Answer the questions.
It asks you two or three short questions, usually with buttons you tap. They cover the angle you want, the structure, and how plain or polished it should sound. Pick what you prefer, or let it choose. It may also ask whether you want British or American spelling.
11. Collect your post.
It gives you a finished post you can copy straight into LinkedIn, plus a few alternative opening lines to swap in. Copy the one you like, read it through, and publish.
Start to finish draft, about two minutes.
One honest note.
The post it gives you is a strong first draft, not something to publish blind.
It is built on solid evidence about what performs on LinkedIn, but it does not know your voice as well as you do, and the platform keeps changing. Read every post before it goes out. Check it sounds like you, and check every fact is true.
You are the editor. The skill gets you to a good draft in two minutes instead of an hour.
I will be sharing my whole library one by one, so subscribe to get each ready-made LinkedIn skill as published.
If this saves you time, forward it to one person who needs it. That is how this newsletter grows, and it costs you nothing.
If someone sent you this, subscribe here for the next one.
This is my go-to approach. I'm on calls all day, and I share my best, most authentic content during them.
For anyone thinking about creating content and struggling, I recommend recording calls, breaking them down, and turning them into content. This is a great resource to share. Thank you.
Most people are sitting on a library they never open.